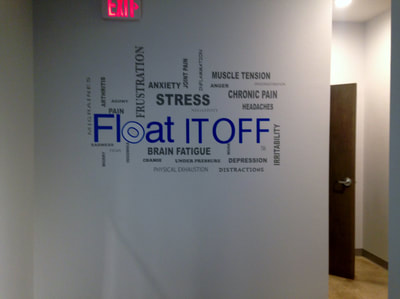
Adding a decal to your business’s walls is a great way to show off your logo or add some decoration. Applying a wall decal is something that anyone can do, but if done incorrectly, you run the risk of messing up the decal or causing air bubbles to get stuck underneath it. In order to get the perfect looking decal on your wall, follow these steps:
Gather the Proper Tools
Before you apply a new decal to your wall, you will need to make sure that you have the proper tools at hand. Without them, you can end up having a messed up decal or one that is applied crookedly on the wall. These are the materials you are going to need:
- A cloth or sponge
- Water for cleaning the wall
- A level
- A pencil
- Some dish soap
- A rubber squeegee
Clean the Application Site
You will want to apply your wall decal to a clean surface. To make sure your wall is clean, run a damp cloth or a sponge over the area where you want to apply your decal to remove any dirt. Make sure that you allow time for the wall to dry before attempting to apply your new decal.
Mark the Right Spot and Apply the Decal
You will want to ensure that your decal is straight and in the right place once it’s applied. To do so, use a level and a pencil to mark the spot where you would like your decal to go. Once you have done this, you can place the wall decal on the marked spot. Make sure that the vinyl is placed against the wall with the paper backing facing you.
After placing the decal, you need to smooth the surface to eliminate any air bubbles that may have been caught underneath. This can be accomplished with a squeegee. For the best results, start at the top and work your way down. Repeat twice to ensure that all of the air bubbles have been removed and that the decal properly adheres to the wall.
Peel the Paper Backing from the Decal
The final step in the application process is peeling the paper backing from the decal. Start at one of the corners and slowly peel back at a 45-degree angle to avoid tearing the decal. If part of the paper gets stuck to the decal, don’t panic. Simply take a damp paper towel and lightly saturate that area of the decal. This will help release the paper backing from the decal.
Following these steps will ensure that your decal looks amazing. For professional designs and spectacular looking decal for your business, you can contact Signs By Randy. We specialize in creating eye-catching decals, signs, car wraps, and other amazing products to help advertise your business. We can also apply any decals for you to help you make sure that they are free of air-bubbles and are on straight. With a professional-looking decal or sign, you will stand out among your competitors and wow your clientele.

 See More Examples Of Our Work